Nirvana Odu

Odiani’s nostalgia

  • Raw banana tikki or known as “Kancha kadali bara” in Odia.

    Raw banana is not much liked by me but a favorite to my mother.

    They are specifically rich in Vitamin C and Vitamin B6.

    It goes well with steamed rice and Dal.

    Lets get started with the recipe :

    Preparation time : 30 minutes

    Ingredients you need ?

  • 2 Raw banana
  • 1/2 cup rice powder/Maida/cornstarch to bind the nuggets.
  • Salt (As per taste)
  • Oil ( I used mustard oil – 3 spoons )
  • Green chillies (3-4 chopped)
  • Ginger and garlic paste (1 spoon)
  • Turmeric powder 2 tbsp
  • Black salt/Sendha namak
  • Coriander leaves/Dhaniya patta


  • Process –

  • Boil the raw banana and make sure it’s dry and not watery when you mash it.
  • Post boil/steam, peel the skin and drench the excess water. Now mash it. You can also use boiled potatoes also but this is optional.

  • Add Turmeric powder, salt, chillies, black salt, chopped coriander leaves and mash well.

  • Make small balls and flatten them in your palms like tikkis.
  • Mix cornstarch, maida or rice powder in water. Now, dip the tikkis in it and coat it well.
  • Take oil in a pan and set the tikkis. Flip it when one side is cooked.

  • Sprinkle black salt on the tikkis once done.

  • You can also use singhare ka atta as coating of the fritters. They give extra crunch!

  • Weekend mornings!! Pancakes!! A yes!!
    Pancakes are super easy and quick to make.

    It is said that Romans invented the flat cake- A sweet n savory dish ( Made in pan – Pancakes).

    I love the almost every flavour in it. This time I used banana. It reminds me of similar sweet dish traditionally loved by the people in North India – Malpua ( Submerged in sugar syrup). There are many dishes similar to pancakes such as dosa, cheela, uttapam, pitha, thalipeeth, appam etc.

    This can be made with eggs and eggless as well. I like the either way it’s prepared!

    Baking powder is used to leaven the batter to make it fluffy.

    Let’s start the process!

    Preparation time : 30 mins

    Things you need:-

  • Flour (Maida) ( cup)
  • Powdered sugar (1 cup) ( As per your taste)
  • Cinnamon powder
  • Baking powder (1 tbsp )
  • Two banana
  • 1 + 1/4 cup of milk ( Warm)
  • Salt ( small pinch )
  • Vanilla essence
  • 1 sp butter ( Kept at room temperature)
  • Honey 1 sp
  • Fruits for toppings ( Optional – I have banana so I would use that as toppings)

  • I prepared the chocolate sauce at home itself .

    You need :
  • Cocoa powder (4 sp)
  • Powdered sugar ( 2 sp)
  • Milk ( 2 sp )
  • Preparation –

  • Mix the banana with one cup milk in a mixer and set aside.

  • Now, to make the batter, take flour in a bowl. Add the dry ingredients mentioned above. Add milk and beat the batter well until you get a streamy consistency (Same as   you prepare of cake).

  • Take a pan, heat it, smear a little butter and pour the batter rotating it towards the outer direction in form of circle with the help of a flat spoon/bowl. Flip and press the other side until it cooks well.

    Now, few batches of it and serve in a plate.

    Mix the cocoa powder, sugar and milk to make a syrup. You can pour it on the pancakes, followed by honey, sprinkle some powdered sugar and banana toppings. Tada!! It’s ready!!

    You can use maple syrup, cream or berries!!


  • This sweet dish is perfect for a quick, easy-to-make dessert that’s both comforting and healthy. The juicy strawberries add a fresh, fruity flavor to the traditional semolina halwa.


    Preparation Time:

    • Total: 25 minutes

    Ingredients:

    • 1 cup sooji/semolina
    • 1 spoon edible ghee
    • 1/2 tsp cardamom powder
    • 1 1/2 cups milk (or water)
    • 3-4 strawberries (mashed well, don’t waste the juice)
    • Dry fruits (as per your choice)
    • Sugar (as per taste)

    Method:

    1. Roast the Sooji:
      • Heat ghee in a pan or kadhai until it melts.
      • Add the sooji/semolina and roast it on medium flame, stirring continuously. Roast until it turns golden brown and releases a nutty aroma.
      • Tip: You can adjust the amount of ghee based on your preference.
    2. Prepare the Milk Mixture:
      • Add the milk (or water) to the roasted semolina. Stir continuously to prevent lumps from forming and to keep it from sticking to the bottom.
      • Lower the flame while adding the milk.
      • Stir and let it cook until it thickens slightly.
    3. Add Sugar and Cardamom:
      • Add sugar and cardamom powder to the mixture. Stir well and let it simmer for about 5 minutes. Keep stirring until the sugar melts completely.
      • Tip: Always keep an eye on the flame, as semolina cooks quickly and can burn if the flame is too high.
    4. Incorporate the Strawberry:
      • Now, add the mashed strawberries along with their juice. Mix well to incorporate the fresh strawberry flavor into the halwa.
    5. Garnish and Serve:
      • Garnish with dry fruits of your choice—cashews, almonds, or raisins work wonderfully.
      • Serve hot or warm!

    Enjoy your Strawberry Semolina Halwa!

    This dish is a beautiful combination of sweet, aromatic semolina with the vibrant tanginess of strawberries. The extra fruity kick adds a healthy dose of vitamin C, making this a delicious and nutritious treat!

  • I have a crabby confession to make: Growing up in coastal Odisha, seafood has always been my lifeline. But a few years ago, my body betrayed me. I developed a throat allergy to prawns, shrimp, and even my beloved crabs. The itching was unbearable, and I had no choice but to say goodbye to my seafood indulgence.

    However, crabs remain my weakness. During my last trip home, I couldn’t resist and snuck in a tiny piece. Of course, my throat itched a little, but greed took over, and I popped an anti-allergy pill like a pro. Prawns, on the other hand, are still the devil in disguise for me.

    As the year wraps up, here’s to missing seafood and making questionable life choices! This dish is packed with Eastern flavors, with the star ingredient being mustard oil—a signature of Odisha’s coastal cuisine.

    Preparation Time:

    40–45 minutes


    Ingredients:

    For the Crab Curry (Kankada Jholo):

    • 4 crabs (cleaned and prepared)
    • 4 tbsp mustard oil
    • 1 tsp Garam Masala
    • 1 bay leaf
    • 2 tomatoes (pureed)
    • 3 tsp ginger-garlic paste
    • 1 tsp coriander powder
    • 1 tsp cumin powder
    • Salt (to taste)
    • Fresh coriander leaves (for garnish)
    • 1–2 potatoes (optional)
    • 1–2 taro roots (Arbi or Saaru)
    • 2 medium-sized onions
    • 2 tsp chili powder
    • 2 green chilies (optional)

    Homemade Garam Masala (Optional):

    • Cinnamon
    • Cardamom
    • Bay leaves
    • Cloves
    • Black pepper
    • Coriander seeds
    • Cumin seeds
    • Dry red chilies

    Method:

    Step 1: Cleaning the Crabs

    • Blanch the crabs in hot water for a few minutes.
    • After blanching, you’ll find a triangle-shaped section in the body.
    • Break it open to remove the guts and gills, then clean thoroughly.
    • If you’re in a hurry, you can always ask your local shopkeeper to do the cleaning for you. If you’ve already got peeled crabs, boiling isn’t required, but give them a quick wash in warm water.

    Step 2: Marinate the Crabs (Optional)

    • Marinate the crabs with turmeric and salt, leaving them for 10 minutes.
    • Important Tip: Do not refrigerate crabs. Prepare immediately as they tend to spoil quickly.

    Step 3: Frying the Crabs

    • In a pan, heat 1 tbsp oil and fry the crabs until they change color.
    • Fry the taro roots and potatoes separately until golden and crispy.

    Step 4: Preparing the Curry

    1. In a heavy pan, heat mustard oil. Add cumin seeds and bay leaves.
    2. Add finely chopped onions and sauté them until golden brown.
    3. Stir in ginger-garlic paste and sauté until the raw smell fades.
    4. Add the garam masala, green chilies, turmeric powder, salt, and chili powder. Sauté until the oil starts releasing from the masala.
    5. Stir in the pureed tomatoes and cook until the oil separates from the tomato mixture.
    6. Add the fried crabs and taro root/potatoes. Sauté for a couple of minutes so the ingredients are well mixed.
    7. Add water to the curry, adjusting the consistency to your preference. Add more salt if needed.
    8. Cover and let it simmer for 15 minutes.

    Step 5: Garnish and Serve

    • Garnish the curry with fresh coriander leaves.
    • Serve hot with steamed rice, and enjoy the warmth and comfort of this coastal delicacy.

    WhatsApp Image 2024-12-16 at 12.04.37 AM

    This Kankada Jholo is the perfect representation of Odisha’s coastal flavors—spicy, aromatic, and irresistibly delicious. With crabs promoting bone health, immunity, and even being an aphrodisiac (yes, you read that right 😉), this dish is both a treat for the taste buds and a boost for your health!

    Enjoy this dish with steamed rice and cherish the nostalgic flavors of the coastal region. Just be sure to have your anti-allergy pills handy, just in case you decide to sneak in a bite (I won’t judge)!

  • Baking cherry cupcakes is a journey of patience and love, resulting in a perfect balance of chocolatey richness and fruity tang. These cupcakes are the ideal treat for anyone who loves the combination of juicy cherries and soft, fluffy cake. Let’s dive into the recipe!

    Preparation Time:

    • Total: 1 hour

    Ingredients:

    • 2 tablespoons vegetable oil
    • 6 tablespoons unsalted butter (softened)
    • 1 cup powdered sugar
    • 2 teaspoons vanilla essence
    • 1 cup all-purpose flour (maida)
    • 1 tablespoon unsweetened cocoa powder
    • 1/2 teaspoon baking soda
    • 1/4 teaspoon baking powder
    • 1/4 teaspoon salt
    • 3/4 cup milk
    • 3/4 cup cherries (pitted and chopped)
    • Optional: Eggs (skipped in the recipe, but you can add them for extra fluffiness)
    • Cupcake liners or moulds
    • Whisk or spoon (optional: hand-beating works too!)

    Method (Using an OTG/Oven):

    1. Prepare the Batter:
      • Beat the vegetable oil, butter, and powdered sugar together until the mixture is fluffy.
      • Add the vanilla essence and mix well.
      • If you’re using eggs, beat them into the mixture now.
    2. Sift and Mix Dry Ingredients:
      • In a separate bowl, sift the all-purpose flour, cocoa powder, baking soda, baking powder, and salt together.
      • Stir the dry ingredients thoroughly to make sure there are no lumps.
    3. Combine Wet and Dry Ingredients:
      • Gradually add the sifted dry ingredients to the sugar-butter mixture, mixing thoroughly after each addition.
      • Slowly add the milk to achieve a smooth batter consistency. Whisk or beat until the batter is light and fluffy—this will give you perfect cupcakes!
    4. Fold in the Cherries:
      • Gently fold in the chopped cherries into the batter, ensuring they’re evenly distributed.
    5. Preheat the Oven:
      • Preheat your oven to 150°C (300°F) for about 10 minutes.
    6. Bake:
      • Line your cupcake moulds with cupcake liners and pour the batter evenly into the cups.
      • Bake for 20 minutes. (Baking times may vary depending on your oven, so keep an eye on them!)
      • To check if they’re done, insert a toothpick into the center of a cupcake—if it comes out clean, your cupcakes are ready.
    7. Cool and Serve:
      • Allow the cupcakes to cool before serving. This makes them easier to handle and lets the flavors set in.

    Tips:

    • For a unique twist, try experimenting with different flavored essences. Vanilla pairs beautifully with cherries, but you can also try almond or coconut essence for a different vibe.
    • For an extra burst of cherry flavor, drizzle some cherry syrup on top or garnish with whole cherries!

      Enjoy your homemade Cherry Cupcakes!

      Each bite of these cupcakes is a perfect blend of chocolatey richness and the juicy goodness of cherries—ideal for any occasion or just as a sweet treat for yourself!

  • Childhood memories often hold a special place in our hearts, and Prathamastami is one of those cherished moments for me. The excitement of waking up early, knowing I’d get to wear the new frock Aja (grandfather) bought for me, was unmatched. The morning would start with the comforting aroma wafting from the kitchen—a prelude to the day’s celebrations.

    Though I’ve never been much of a pitha fan, Enduri Pitha is an exception—a “one in a minion” delicacy for me. All dolled up in my new dress, adorned with alta on my feet, I’d eagerly wait, sitting on the pidha (wooden stool), as Maa performed the aarti for me.

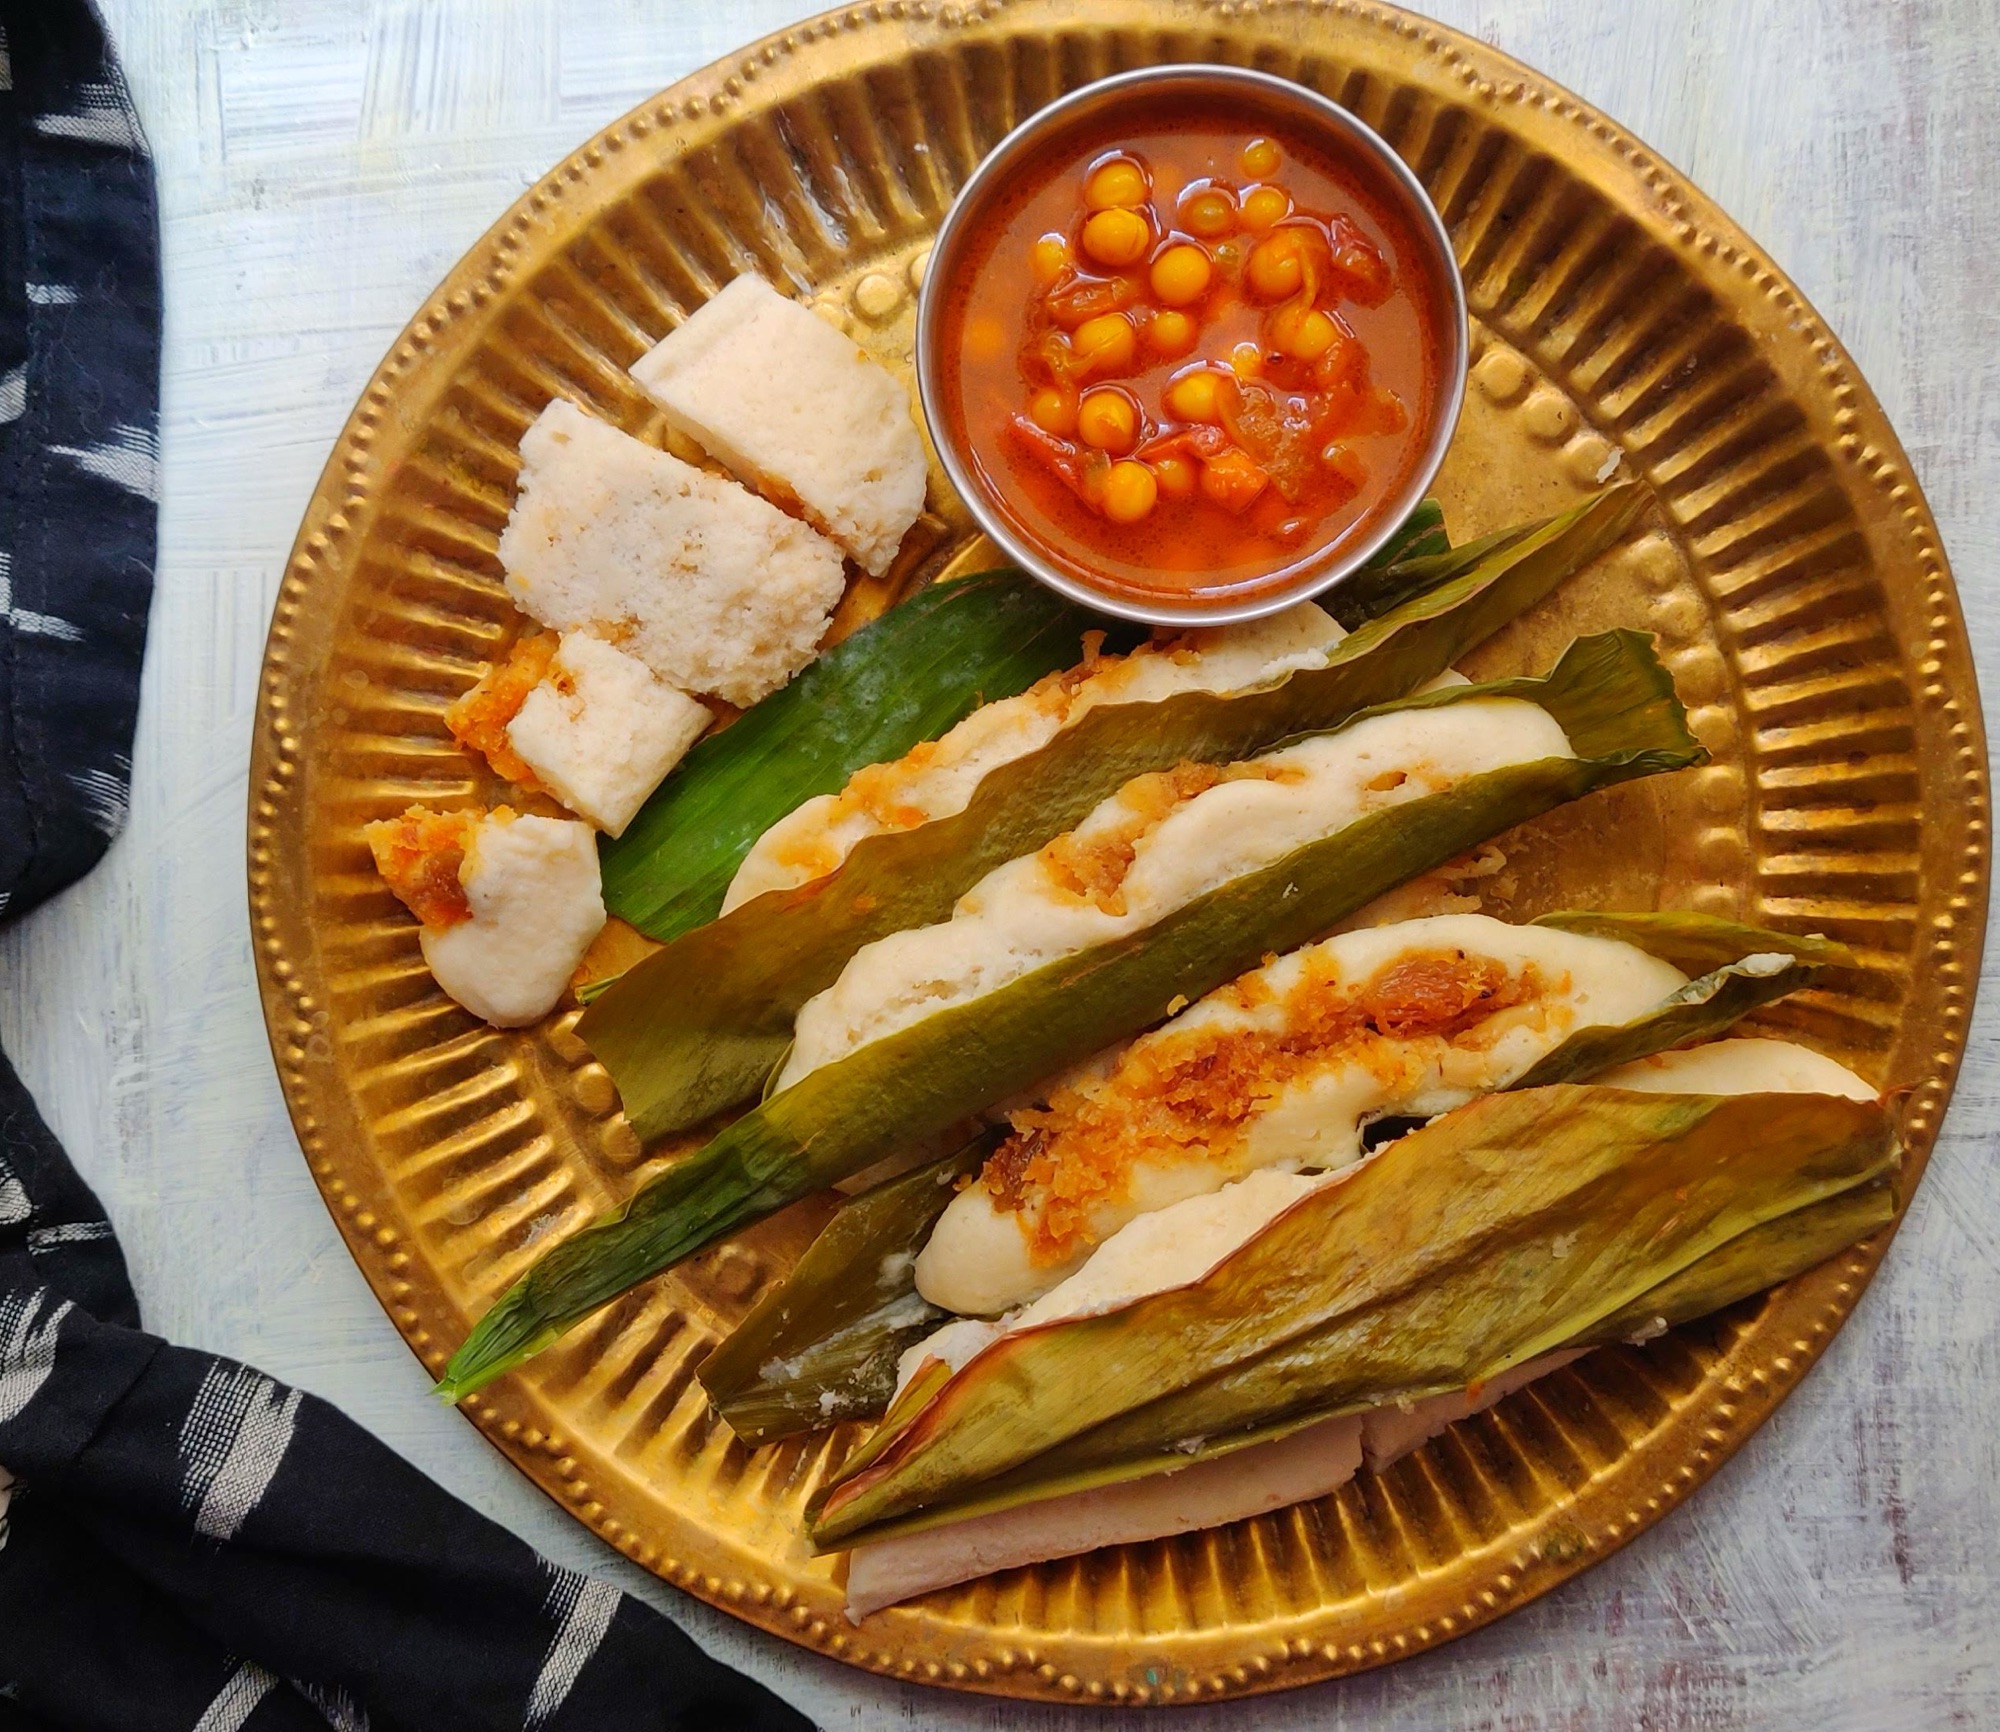
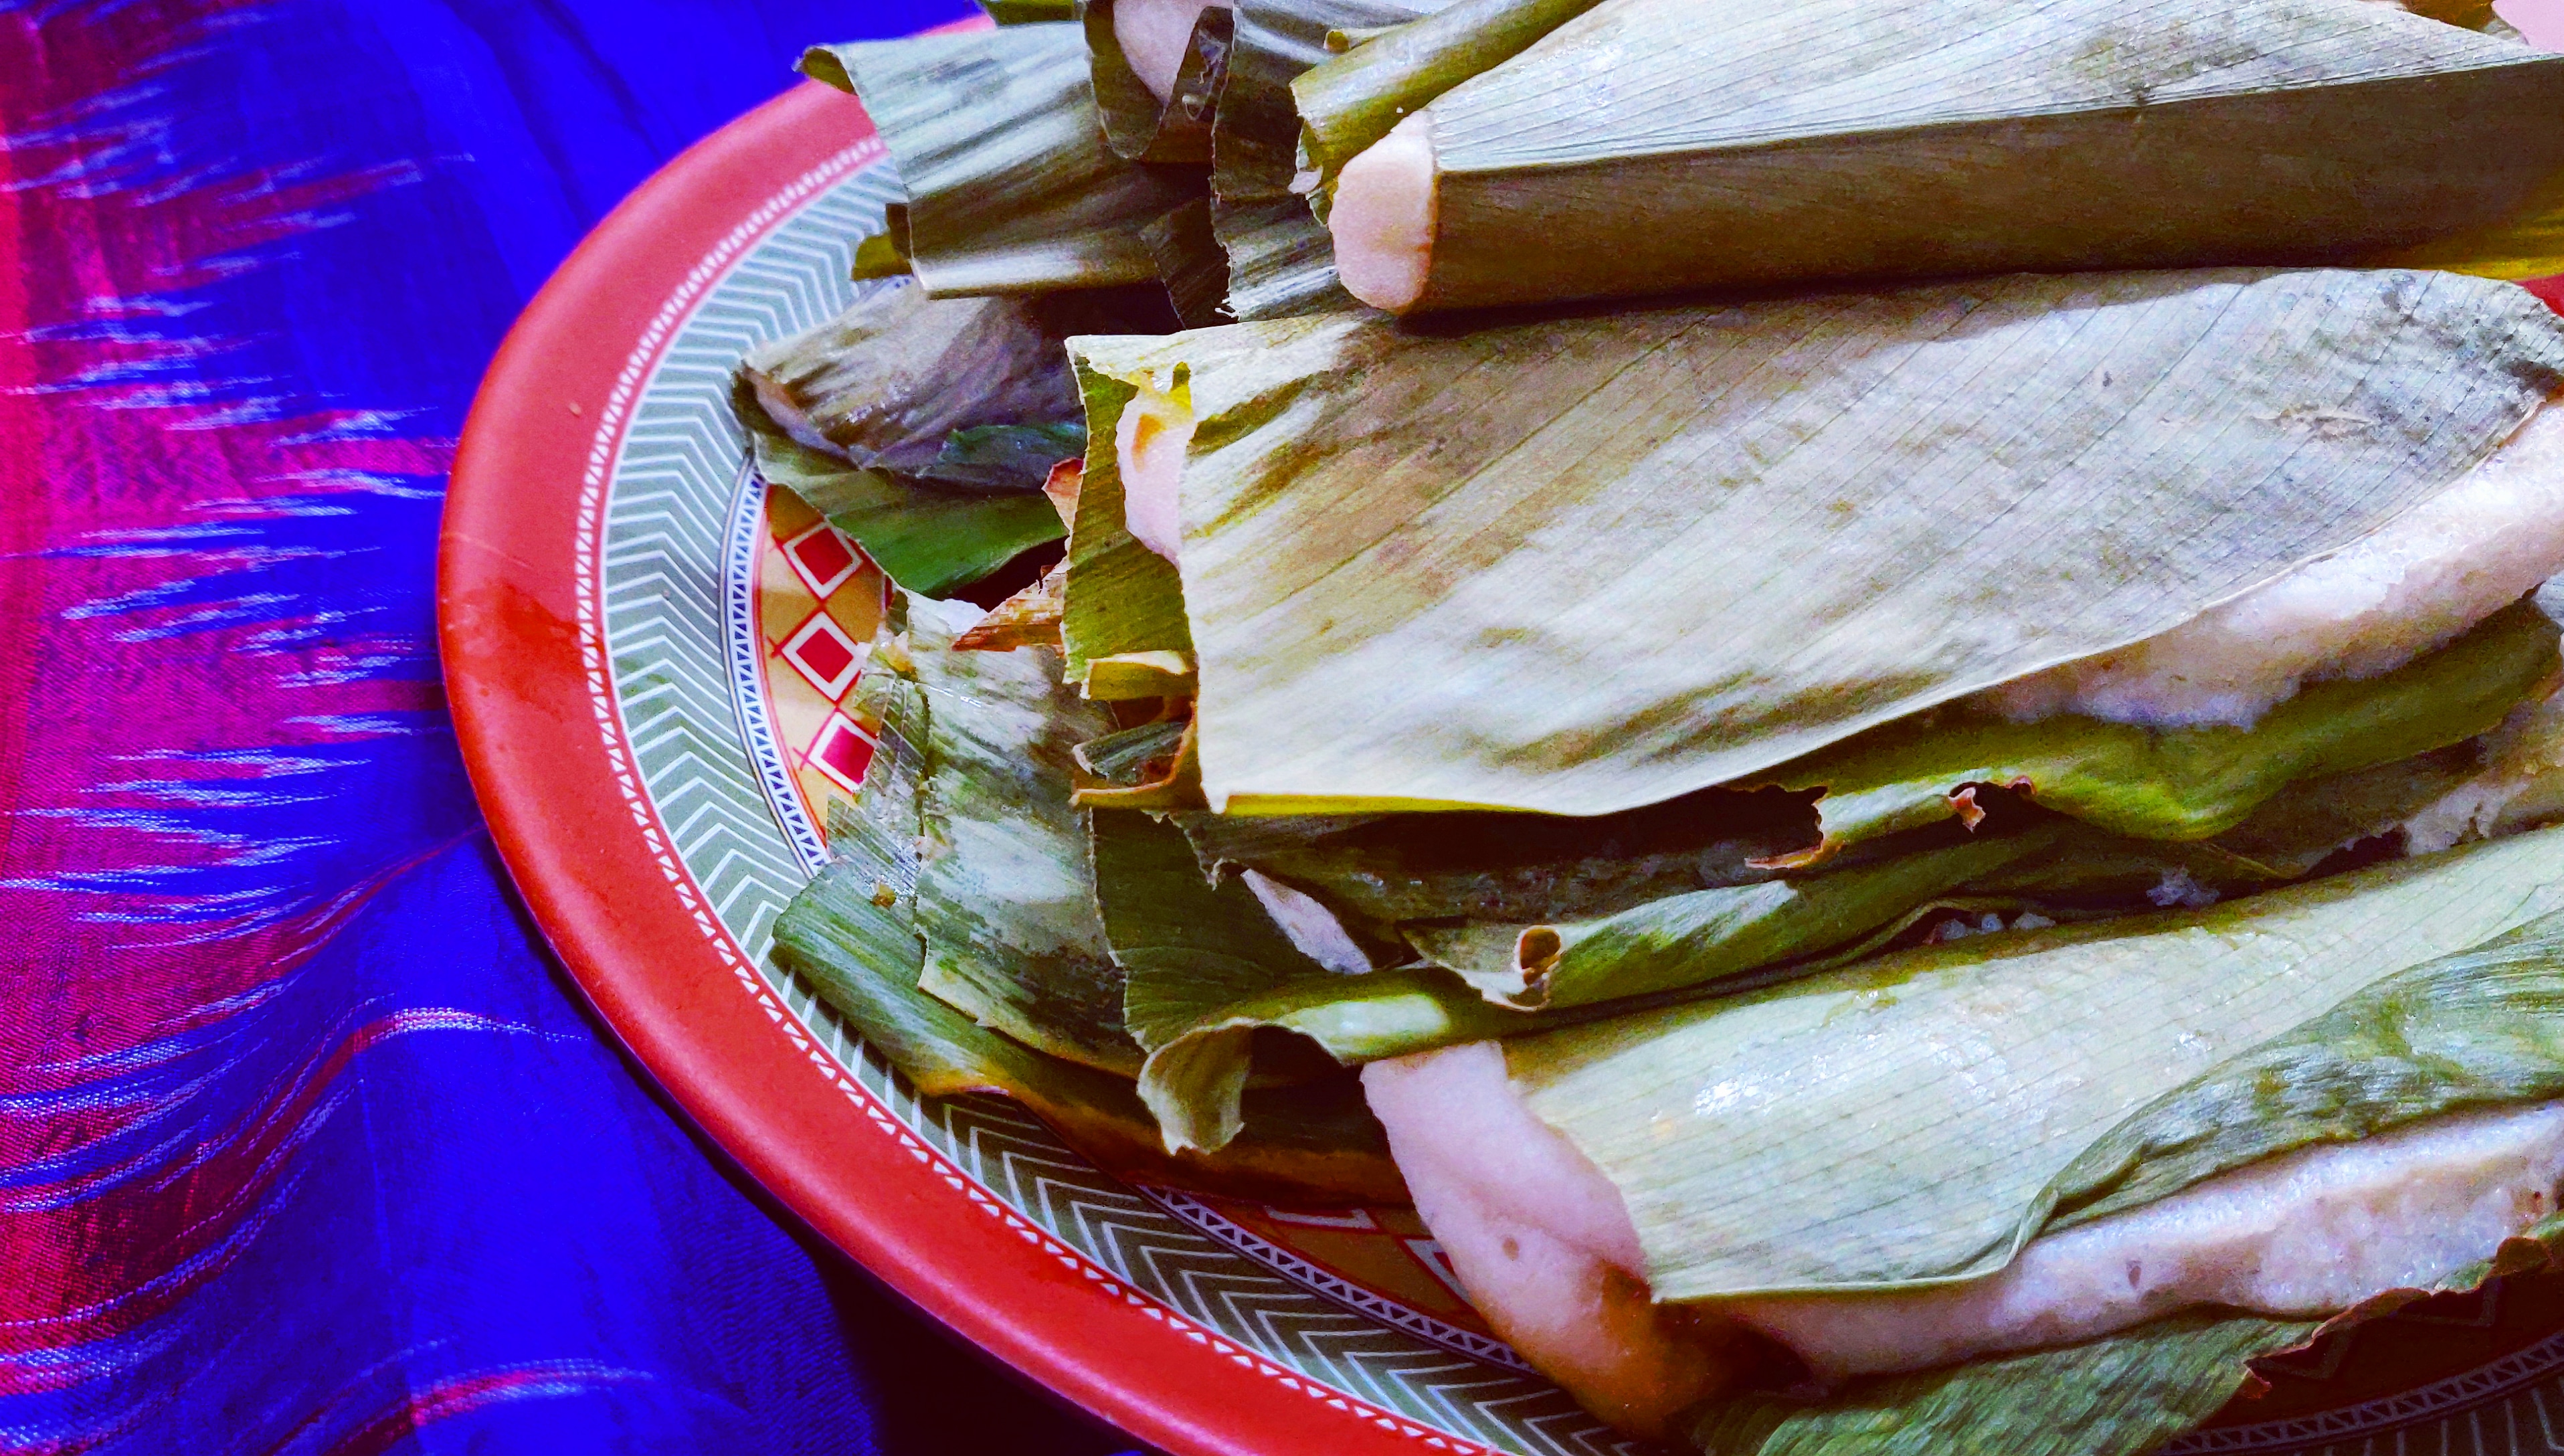
    The tradition of making Enduri Pitha starts the day before, soaking urad dal and rice to prepare the batter, which is then stuffed into turmeric leaves with a caramelized coconut-jaggery filling. Prathamastami is a day to celebrate and pray for the well-being of the eldest child. The new dress, often gifted by Mamu Ghara (maternal uncle’s house), added to the joy.

    For me, this pitha isn’t just food—it’s a treasure trove of memories. I call it “Enduring Pitha”, as it not only symbolizes love and tradition but also boosts immunity, thanks to the healing properties of turmeric leaves.

    Now, living far from home, sourcing turmeric leaves was a challenge, but where there’s a will, there’s always a way!

    Recipe: Enduri Pitha

    Preparation Time:

    20–25 minutes (excluding batter soaking and fermentation)

    Ingredients:

    For the Batter:

    Rice (Basmati or Arua) – 2 cups

    Urad dal – 2 ½ cups

    For the Stuffing:

    Grated coconut – 1 ½ cups

    Jaggery – 1 cup (grated)

    Ghee – 1 tablespoon

    Cardamom (Elaichi) – 2–3 pods, crushed

    Peppercorns – 3–4 (optional)

    Dry fruits – As per choice (e.g., cashews, raisins)

    Other:

    Turmeric leaves – 8–10 (cleaned and halved, if large)

    Salt – As per taste

    Method:

    Step 1: Preparing the Batter

    1. Soak the rice and urad dal separately for 4–6 hours.

    2. Grind them into a smooth batter using minimal water.

    3. Add salt and whisk well to ensure aeration.

    4. Allow the batter to ferment overnight for a fluffy consistency (similar to idli batter).

    Step 2: Preparing the Stuffing

    1. Heat ghee in a pan.

    2. Add cardamom, peppercorns, and dry fruits (if using). Sauté for a few seconds.

    3. Add grated coconut and sauté until the moisture evaporates.

    4. Mix in the jaggery and cook until the mixture becomes slightly sticky and glossy.

    • Tip: Do not overcook, as the stuffing may turn dry.

    Step 3: Assembling and Steaming

    1. Set up a steamer. If using a regular idli steamer, line it with a clean muslin cloth and make small holes for ventilation.

    2. Take a turmeric leaf and place a spoonful of batter at its center.

    3. Spread the batter evenly using your fingers (greased with water).

    4. Add a spoonful of stuffing in the middle and fold the leaf gently to seal it.

    5. Repeat for all leaves and place them in the steamer.

    6. Steam for 20–25 minutes. Check if done by piercing with a toothpick—it should come out clean.

    Serving:

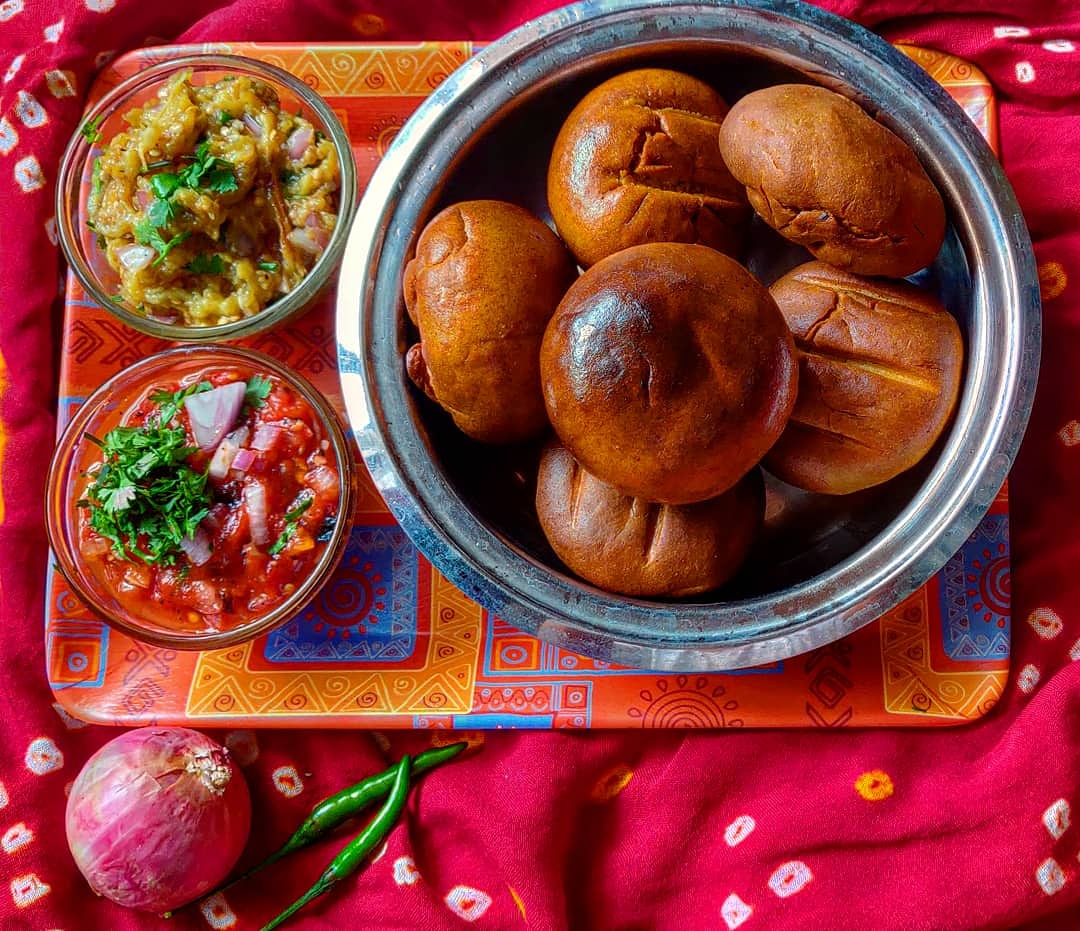
    Serve the hot Enduri Pithas with Ghugni (white peas curry) or chutney. The earthy aroma of turmeric leaves paired with the sweet filling makes every bite a celebration!

    Relive the tradition, savor the taste, and embrace the nostalgia with Enduri Pitha.

  • Mangoes—just the name brings back a flood of memories. It’s not just a fruit; it’s a feeling. This beloved fruit is consumed in a million ways, and every recipe using mangoes has its own special charm. From mangoes in curries to chutneys and desserts, it’s truly a fruit that never goes out of style.

    The mango is not only the national fruit of India and Pakistan but also the national tree of Bangladesh—its importance in the subcontinent can’t be overstated.

    For me, mangoes mean summer, childhood vacations, and memories that linger. We had a mango tree in our backyard, with tiny, green mangoes swaying gently in the summer breeze.

    And, oh, the raw mango preparation! Red chili, salt—hot and tangy! I can still picture my grandmother sitting in the sun, making pickles, with the aroma of ripe mangoes filling the air.

    This Mango Smoothie is not just a drink; it’s a refreshing sip of summer nostalgia. Every time I make this, I’m transported back to those lazy summer days, enjoying mangoes in every form.

    It’s simple, it’s creamy, and it’s perfect for beating the heat—a quick fix to quench your thirst and satisfy those mango cravings!

    Preparation Time:

    10 minutes


    Ingredients:

    • 2 ripe mangoes (semi-frozen or refrigerated)
    • 1 cup boiled milk (low-fat if you prefer)
    • 1 spoon yogurt (optional)
    • 2 pinches cinnamon powder

    Method:

    1. Prepare the Mangoes:
      • Take the ripe mangoes and refrigerate them or keep them semi-frozen for that thick, creamy texture.
      • Peel and chop them into chunks for easy blending.
    2. Blend the Ingredients:
      • In a blender, combine the chopped mangoes with the boiled milk.
      • Add yogurt (optional) for added creaminess and tang.
      • Blend until smooth and creamy.
    3. Add Spice:
      • Sprinkle cinnamon powder into the mixture for a delightful aromatic touch.
    4. Serve:
      • Pour the smoothie into glasses, garnish with a little extra cinnamon or yogurt, and enjoy the refreshing taste of summer.

  • Desserts have a magical way of connecting us to our past, and Rasmalai is no exception. This soft, spongy, syrup-soaked delight has captured hearts across Odisha, Bengal, Bihar, and beyond.

    I remember watching my mother make Rasmalai from scratch—patiently preparing the chenna, shaping it into perfect little balls, and steaming them. She would then preserve them in the fridge for days, ensuring we always had a treat on hand.

    But here’s the fun part: I’d sneak into the kitchen and gulp down the raw, unsteamed chenna balls before she could stop me. (If you haven’t tried this, trust me, it’s a whole different kind of joy!)

    And then there’s Rabri, the rich, creamy malai that would soak these tender balls. It wasn’t just a topping; it was the soul of the dessert. To this day, Rabri holds a special corner in my heart, and I couldn’t resist integrating that essence into this Bread Rasmalai recipe—a quick, modern twist on the classic.

    This Bread Rasmalai is more than just a dessert—it’s a quick trip down memory lane. The creamy malai, the indulgent Rabri, and the soft bread soaked in sweet milk create a dish that’s both comforting and celebratory.

    Preparation Time:

    20–30 minutes (excluding cooling time)


    Ingredients:

    • For the Rasmalai Base:

      • 5–6 slices of Bread
      • 3 cups Milk
      • 1/2 cup Fresh cream
      • 5–6 tbsp Condensed milk (Milkmaid)
      • 3–4 strands of Saffron (optional)
      • 1/4 tsp Cardamom powder
      • 5–6 chopped Almonds (and other nuts)
    • For the Rabri Touch:

      • 1/2 cup Milk (reserved)
      • 1/2 tsp Cardamom powder
      • 2 tbsp Sugar (or as per taste)
      • A few strands of Saffron (optional)

    Method:

    1. Boil the Milk:

      • In a pan, boil the 3 cups of milk on medium heat. Stir occasionally and let it simmer for 8–10 minutes until it thickens slightly.
    2. Prepare the Rabri:

      • Take the reserved 1/2 cup milk and simmer it separately.
      • Add cardamom powder, sugar, and saffron (if using). Stir continuously until the mixture thickens into a creamy Rabri. Set aside to cool.
    3. Make the Malai:

      • To the main milk mixture, add fresh cream and condensed milk (Milkmaid). Stir well and simmer on low heat for another 4 minutes. Be careful to prevent burning or sticking at the bottom.
    4. Spice It Up:

      • Add cardamom powder to the malai. If using saffron, soak the strands in 2 tbsp of hot milk and add them in. Let the malai cool.
    5. Prepare the Bread:

      • Cut the bread slices into round shapes using a cookie cutter or small bowl. (Tip: Don’t waste the edges—you can toast or use them for another dish!)
      • Lightly soak the bread rounds in the malai mixture, ensuring they’re damp but not fully saturated.
    6. Assemble the Rasmalai:

      • Place the soaked bread rounds into a serving dish.
      • Pour the remaining malai over the bread. Drizzle the prepared Rabri on top for that rich, indulgent touch.
    7. Garnish & Serve:

      • Garnish with chopped almonds and other nuts. Refrigerate for at least 2 hours before serving for the flavors to meld together.

    And let’s be honest—if you’re like me, sneaking bites of the unsteamed chenna or the malai straight from the pan is half the fun!

  • A beloved delicacy of Bihar, Jharkhand, Odisha, and Uttar Pradesh, Litti Chokha holds a special place in Indian cuisine.

    The star of this dish is Sattu, a flour made from roasted Bengal gram (called Chatua in Odisha). Traditionally, sattu is prepared by dry roasting ingredients like cashews, almonds, millets, barley, and chickpeas in sand using an iron container. After roasting, it is sieved and ground into a fine flour, making it rich in flavor and nutrients.

    Litti is flavored with Indian spices, roasted over coal, cow dung cakes, or wood, and generously coated with ghee for that heavenly aroma and taste. Similar to Rajasthan’s Dal Batti, Litti has its own unique preparation and accompaniments, including Baigan Bharta, Tamatar Chokha, and Aloo Chokha. For non-vegetarians, it pairs beautifully with chicken curry.

    Hot litti soaked in ghee with sides of smoky chokha makes for an irresistible, wholesome meal.

    Preparation Time:

    1 hour

    Ingredients:

    For the Dough:

    • 2 cups Atta/Wheat Flour
    • 2 tbsp Vegetable Oil
    • 1/2 tsp Salt
    • 1 cup Water

    For the Stuffing:

    • 1 cup Sattu
    • 1/2 tsp Ginger-Garlic Paste (or grated ginger and garlic)
    • 1 Medium Onion (finely chopped)
    • 2 Green Chilies (finely chopped)
    • 1/2 tsp Ajwain (Carom Seeds)
    • 1 tsp Amchur Powder (Mango Powder)
    • Salt (as per taste)
    • Pickle Oil and Masala (or substitute with Mustard Oil)
    • 1/2 tsp Nigella Seeds (Kalonji)
    • Coriander Leaves (finely chopped)
    • A little Water (for mixing)
    • 1 cup Ghee (for smearing)

    For the Chokha:

    • 1 Medium Eggplant (Baigan)
    • 2 Medium Tomatoes
    • 2–3 Boiled Potatoes
    • 1 Medium Onion (finely chopped)
    • 2 Green Chilies (finely chopped)
    • 3–4 Garlic Cloves (grinded with mortar and pestle)
    • 1 tbsp Mustard Oil
    • Salt (as per taste)
    • Coriander Leaves (finely chopped)

    Other Sides:

    • Yogurt (optional)

    Method:

    Step 1: Preparing the Dough

    1. In a bowl, mix wheat flour, salt, and 2 tbsp oil.
    2. Add water gradually and knead into a smooth dough. Let it rest for a while.

    Step 2: Preparing the Stuffing

    1. In a mixing bowl, take sattu. Add onion, ginger-garlic paste, coriander leaves, green chilies, kalonji, ajwain, salt, amchur powder, and pickle oil (or mustard oil).
    2. Mix well, adding a little water to make the stuffing damp but not overly wet. The mixture should be crumbly yet hold together slightly when pressed.

    Step 3: Assembling the Litti

    1. Divide the dough into medium-sized balls.
    2. Roll each ball out slightly, add a generous portion of stuffing to the center, and wrap the dough around it to seal completely.
    3. Shape into smooth balls.

    Step 4: Baking the Litti

    1. Preheat the oven to 150°C.
    2. Smear ghee on the prepared littis and place them on a greased baking tray.
    3. Bake for 40–45 minutes, flipping them halfway through for even cooking.
    4. Once done, generously coat the hot littis with ghee for that authentic flavor.

    Step 5: Preparing the Chokha

    1. Roast the eggplant (slit halfway), tomatoes, and garlic cloves directly over a flame until charred and smoky.
    2. Remove the charred skin and mash the eggplant and tomatoes together in a bowl.
    3. Boil and mash the potatoes separately, or combine them with the eggplant-tomato mixture.
    4. Add finely chopped onion, green chilies, mustard oil, garlic, coriander leaves, and salt. Mix well for an authentic, rustic flavor.

    Serving Suggestions:

    • Serve hot littis soaked in ghee alongside the smoky Baigan Bharta, Tamatar Chokha, and Aloo Chokha.
    • A dollop of yogurt on the side makes for a cooling contrast.
    • For non-vegetarians, pair the littis with spicy chicken curry for a hearty meal.

    With each bite, enjoy the crispy outer crust of the litti, the spicy sattu stuffing, and the smoky, tangy chokha.

  • The first thing that comes to mind when we think of Dhokla is undoubtedly Gujarat. But this beloved dish has traveled far beyond the western region and is now a favorite across India.

    From Khandvi Dhokla to Rava Dhokla, Besan Dhokla, and Khaman Dhokla, there’s a variety for everyone to relish. This steamed, pulse-based dish, seasoned with aromatic spices and served with chutney, is not only flavorful but also a quick and healthy breakfast option.

    Fluff Matters: Fermentation Secrets

    Fermentation is key to achieving that perfect, spongy texture. You can either let the batter ferment overnight for a traditional touch or take the instant route with Eno (or soda bicarbonate). The choice is yours!

    It can be steamed traditionally or microwaved for convenience, making it a versatile dish for every kitchen.

    Preparation Time:

    25–30 minutes (Instant method)


    Ingredients:

    For the Batter:

    • 2 cups Gram flour (Besan)
    • Salt (as per taste)
    • A pinch of Turmeric powder
    • 1 cup Curd/Yogurt (beaten)
    • 1 tsp Ginger paste
    • 1 tbsp Lemon juice
    • 1 tsp Eno/Soda bicarbonate
    • 1–2 Green chilies (finely chopped)

    For Tempering and Garnish:

    • 2 tbsp Oil
    • 1 tsp Mustard seeds
    • A pinch of Sugar (optional, for caramelization)
    • Dry red chilies or green chilies (as per preference)
    • Finely chopped Coriander leaves
    • Grated Coconut (optional)

    Method:

    Step 1: Preparing the Batter

    1. In a mixing bowl, add gram flour, curd, and 1 cup of warm water. Mix well to form a smooth batter, ensuring there are no lumps.
    2. Add salt and whisk thoroughly.
    3. For traditional fermentation, leave the batter to rest for 3–4 hours. For instant preparation, add Eno and let it sit for 10 minutes.

    Step 2: Adding Spices and Steaming

    1. Once fermented, add turmeric powder, ginger paste, and finely chopped green chilies to the batter. Mix well.
    2. Whisk the batter briskly after adding Eno for a fluffy texture.
    3. Grease a thali or a steaming plate and pour the batter evenly into it.
    4. Place the plate in a steamer, cover with a lid, and steam for 10 minutes on medium heat.
    5. Once done, let it cool before cutting the Dhokla into squares or diamond shapes.

    Step 3: The Tempering

    1. Heat oil in a pan. Add mustard seeds and let them sputter.
    2. Add dry red chilies or green chilies (as per preference). Optionally, add a pinch of sugar and let it caramelize for a hint of sweetness.
    3. Pour this tempered mixture over the Dhoklas evenly.

    Step 4: Garnish and Serve

    1. Garnish the Dhoklas with finely chopped coriander leaves and grated coconut (if desired).
    2. Serve with your favorite chutney and enjoy the fluffy, flavorful goodness!

    This easy-to-make Dhokla is not just a treat for your taste buds but also a wholesome start to your day. Whether for breakfast, a quick snack, or a party appetizer, Dhokla never fails to impress.

  • Design a site like this with WordPress.com
    Get started